NOTE: This is the same lesson, with a few changes that makes things clearer, as ENTER PHOTOSHOP.
Here is your FIRST Photoshop lesson. Use this as a basis to start with. Try out different colors, different fonts and different size fonts too. If you make other discoveries - GREAT!! But be sure you have this basic lesson down pat. It's important. Really.
Beginning your Photoshop Document
Open the application.
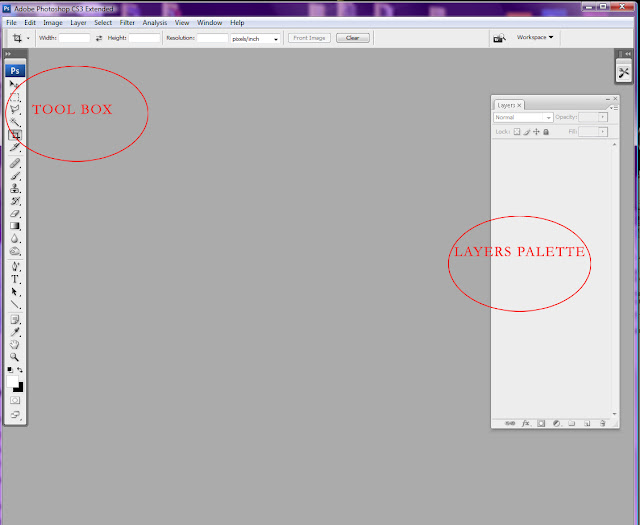
This is what you should see: The tool box on the left and the Layers Palette on the right. If it doesn't look like this, then use the top arrow in that string of tools known as the TOOLBOX to move stuff around. If there are other palettes on there, use that little X in the upper corner to get it out of the way. You aren't deleting it, honest.
Now go to FILE>New
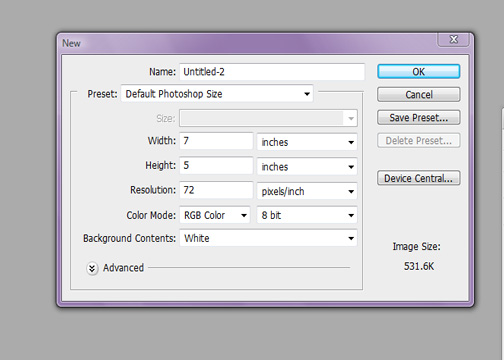
This is what you should see as the pop up menu -
You want the preset to read “Default Photoshop Size”
It will automatically come up with the dialogue you see here. Check out the color mode as RGB Color and 8 bit. The background contents: white. You can change any of these later on.Don't be afraid to experiment, press those buttons to see what is underneath. But come back to this one as our lesson for today.
You may name this now: My First Photoshop
- OR wait until you are done and then name it.
Press OK.
And this is what you should see:
N
Next select the T or the TYPE TOOL on the tool bar.Look at the top of your photoshop document and you will see selections to make for your font and the size as well as the color. If you want a different color, click on the rectangle color you see on the top bar. Select your color. Now you are ready to type some text. Use something simple, like your name or “My First Photoshop.”
Use the selection arrow – the first tool on the top of your toolbox – to move your text around. Position your text so you like where It is.
Notice the two layers on the Layer Palette on the right. It's not circled - but notice it.
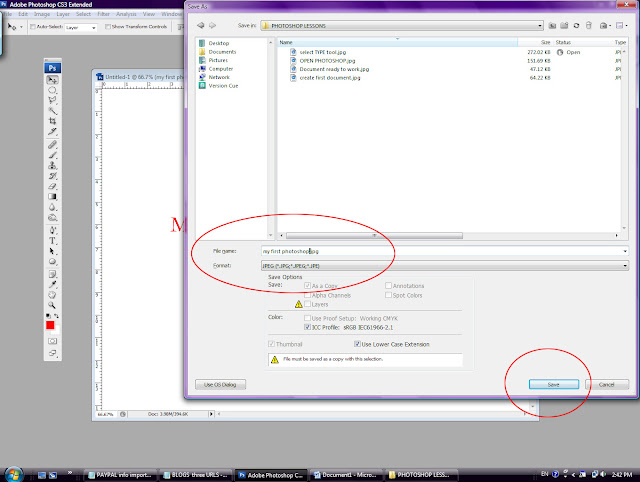
When you are done “playing” you will want to save your document. Go to FILE>SAVE
We will save it as a jpg this first time around but the one of the things you need to notice is the Layers Palette on your right. (I know, I mentioned this already - just checking!) Notice the 2 layers. They will become one layer when you save it as a jpg. You cannot change anything once you have saved it this way. (We will learn to save it later as a layers document so you can actually change anything you want to after you have worked on it.That is what Photoshop is all about - LAYERS)
Save your first Photoshop document in a folder on your desktop so you will know where it is and also where you can put subsequent lessons. Print this out and put this in there too.
This is what your screen should look like.
Good work for your first lesson! See – it’s not that difficult is it?
Next Lesson: Layers


